BackYH35XX Programmer + Simulator Instruction
-
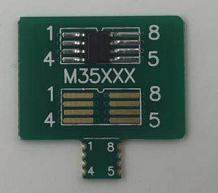
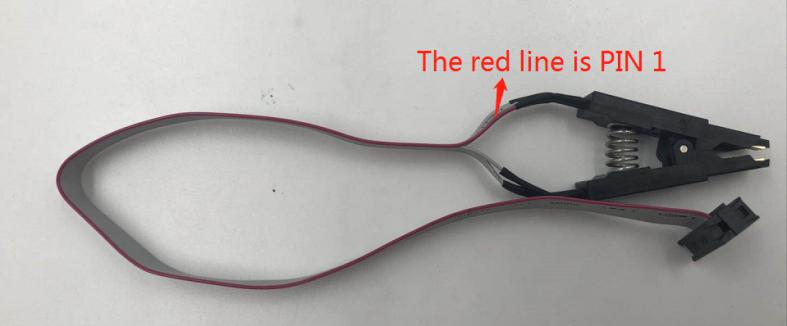
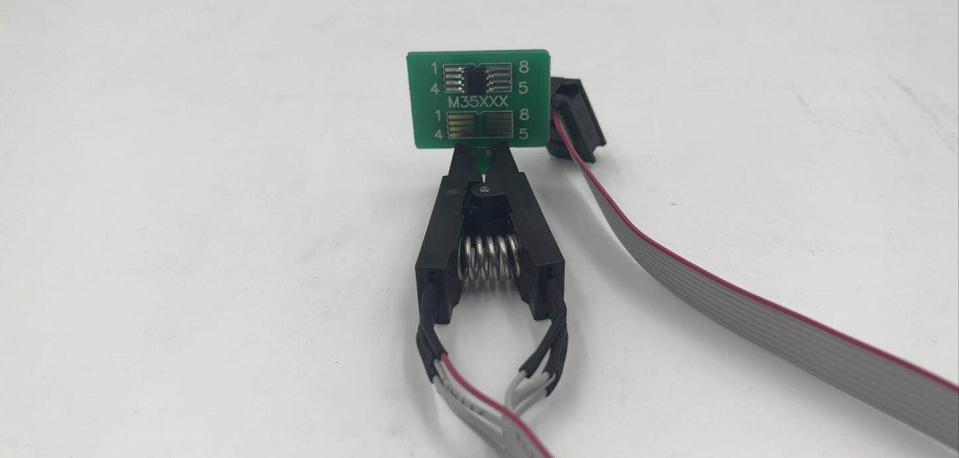
1.Dismantle the original 35XX EEPROM from the odometer and solder it to the adaptor board.Then clamp the adaptor board with the solder-free clamp. Make sure the direction of the adaptor board and solder-free clamp is correct.
-
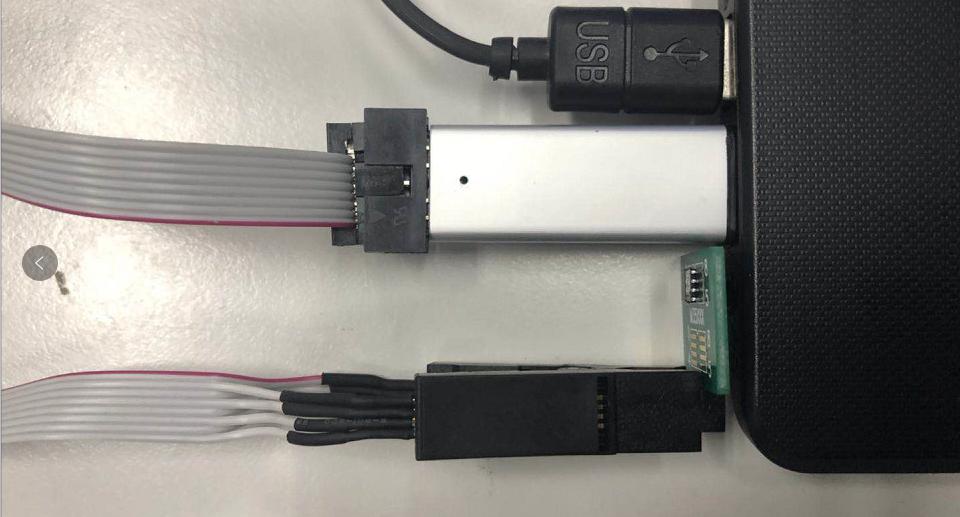
2.Plug the YH35XX programmer into the USB port of the PC,Click "computer" and it will recognize a usb flash drive named 35XX programmer.

-
3.Click U disk 35XX programmer,Double-click "BMW_ODO_Standard_edition. exe" to open the software.

-
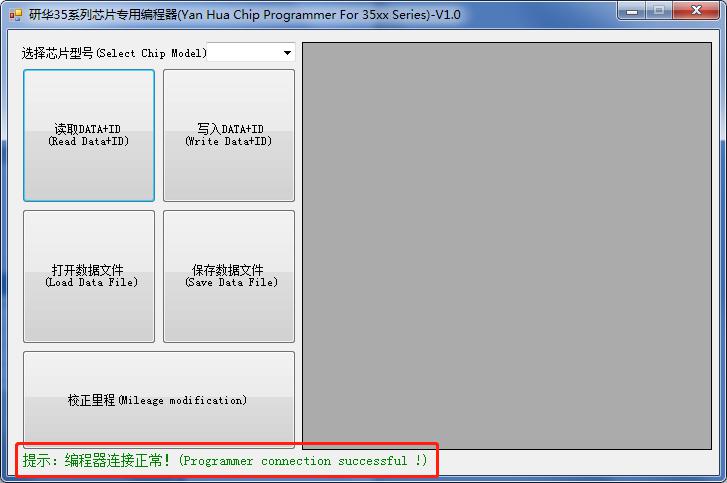
4.Wait for the prompt: Programmer connection successful,Then run it.
-
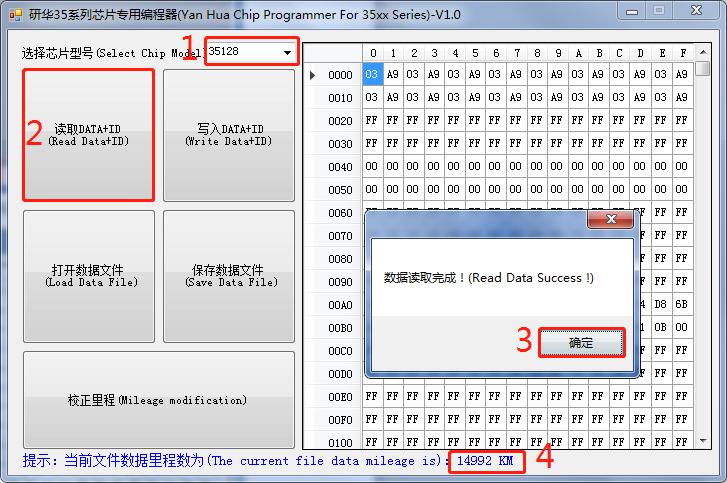
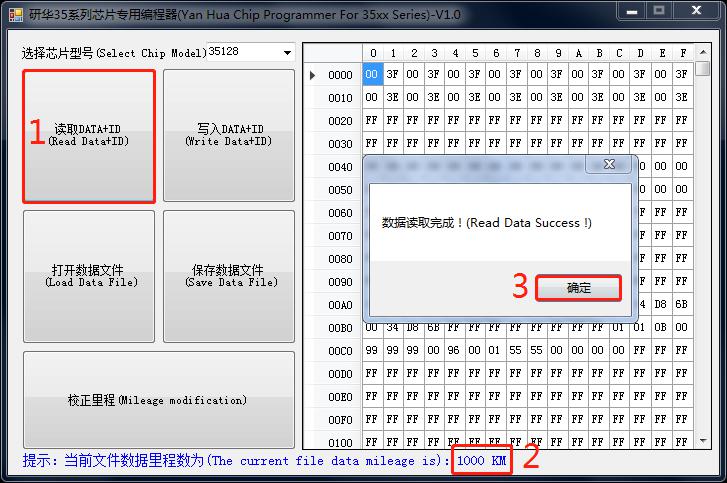
5.Select the EEPROM model and click "Read DATA+ID", check whether the read mileage is the same as the actual mileage.
-
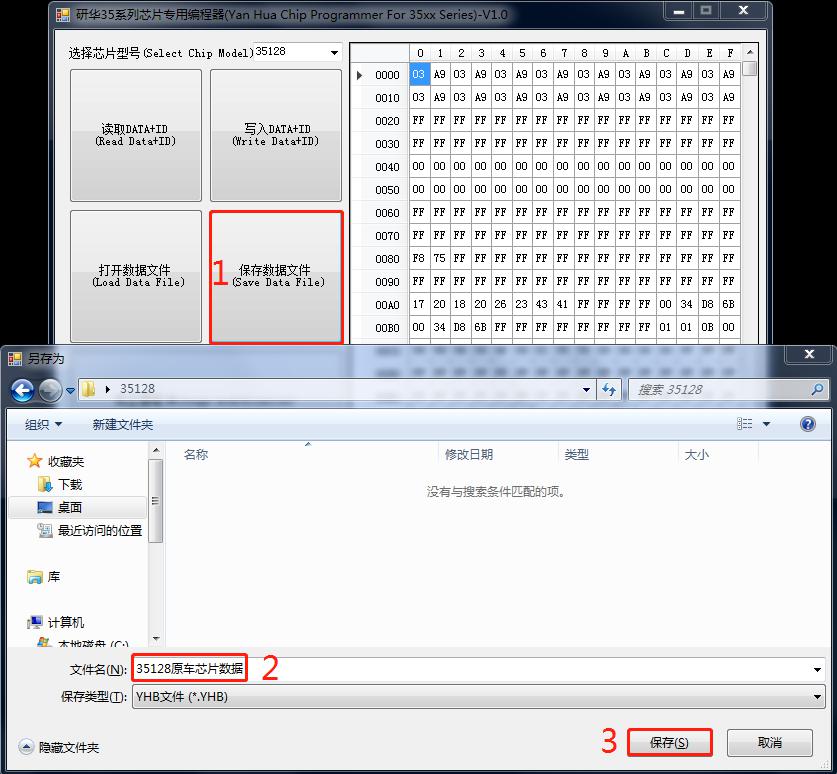
6.Click "Save Data File", Save the original data of original EEPROM to the folder.
-
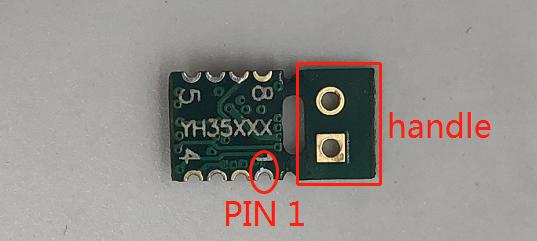
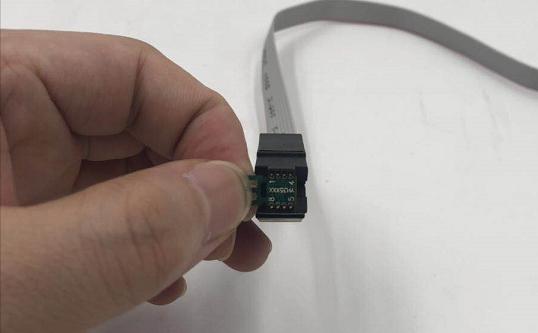
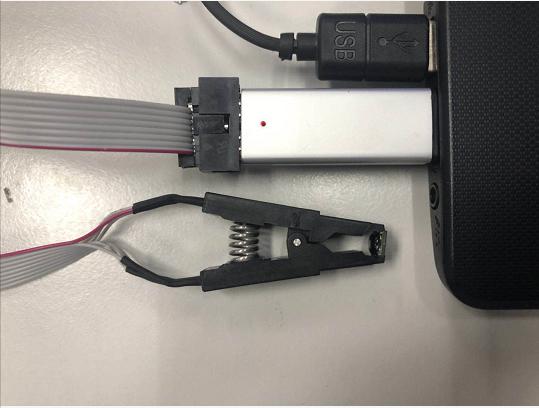
7.Hold the handle of the simulator, Clamp the Simulator with the solder-free clamp. Pay attention to the direction. Then connect the solder-free clamp to the programmer, connect the programmer to the PC.
-
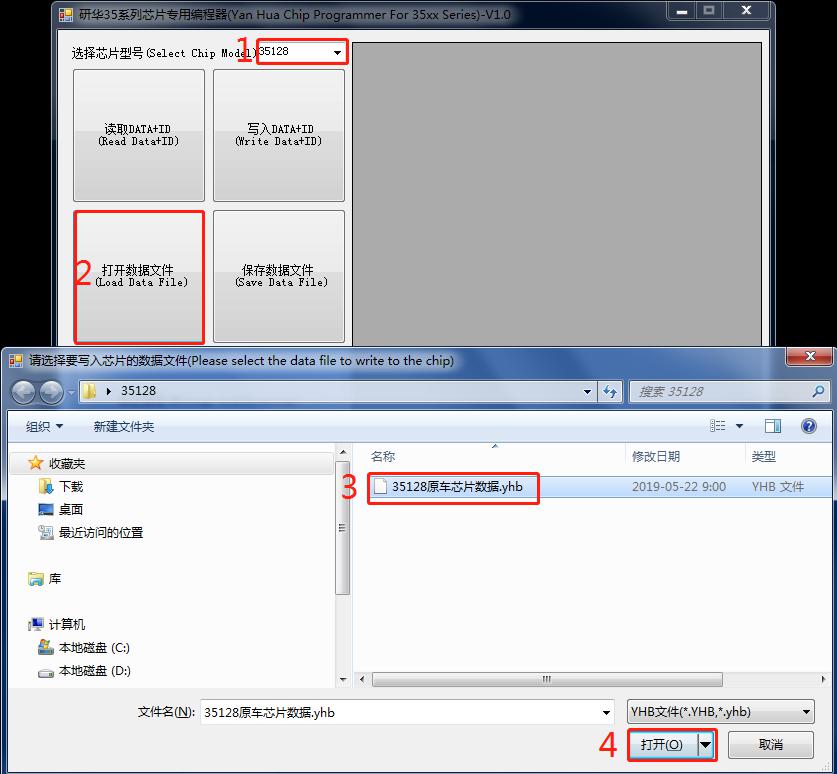
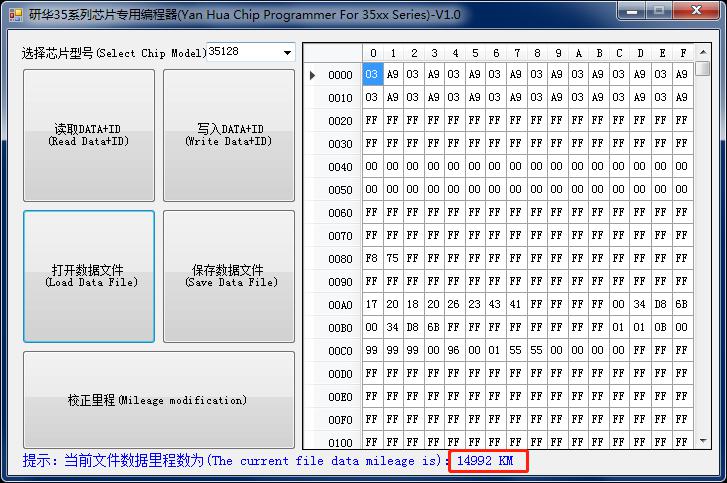
8.Select EEPROM model, click "Load Data File", Select the corresponding data of original EEPROM and load it. Check whether the displayed mileage is the same as the mileage displayed in odometer.
-
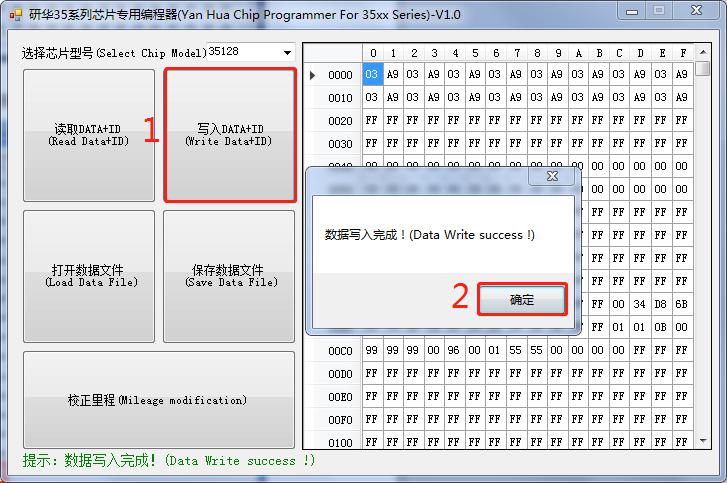
9.Once the mileage is confirmed, click "Write DATA+ID", Write the original data into the Simulator.
-
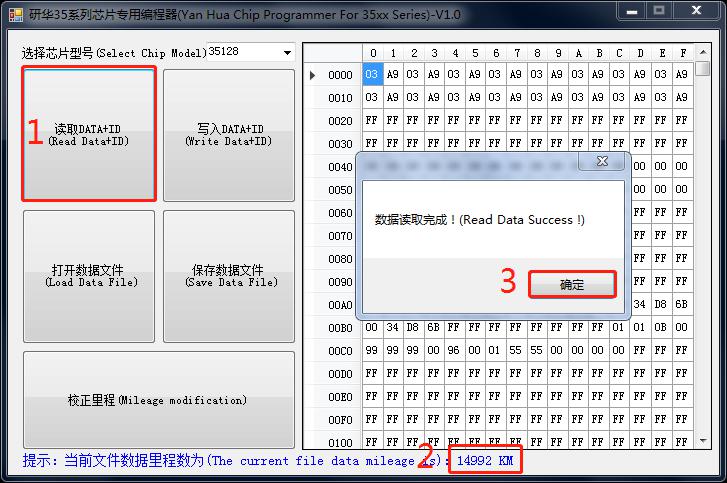
10.Click "Read Data+ID", read the data written into the Simulator, and check the mileage.
-
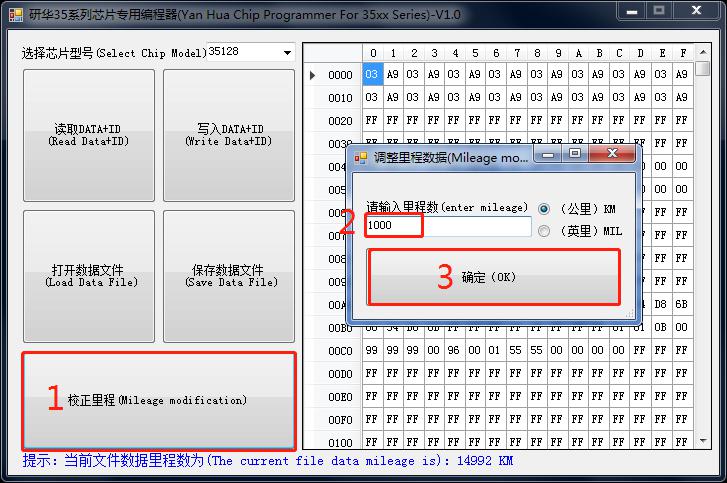
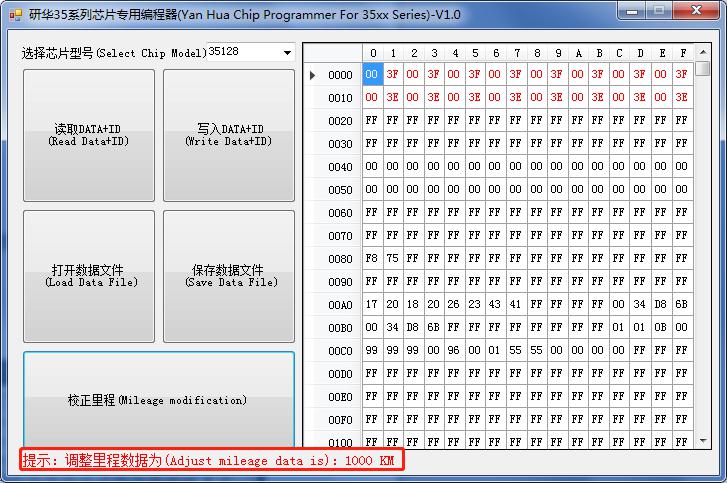
11.After the mileage is confirmed, click "Mileage modification" and input the mileage you want.
-
12.After confirm the input mileage is correct, click "Write DATA+ID" to write the modified data into the Simulator.

-
13.After the data is written, click "Read DATA+ID" to check whether the mileage modification is correct.
-
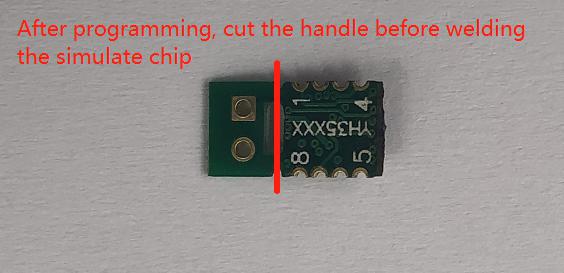
14.If the displayed mileage is the same as what you want, cut off the handle of the Simulator, and solder the Simulator to the original EEPROM position. Pay attention to the EEPROM direction. Install the odometer back to the car to verify whether the mileage modification is successful.
 Aliexpress Shop
 Home
Home